 The following is the recipe that Ruth uses to make playdough or baker’s clay in her work with children and on her own sculptures. It is economical because it can be baked in your kitchen oven. It cannot be used for making dishes because it is not water-resistant. Once baked, it will decompose if exposed to too much moisture (for example, a bathroom where the steam from the shower creates moisture). It cannot be used to make free-standing sculpture because the dough lacks body. You must make your objects flat. When your object is done, it should not be more than 1 to 1 ½ inches thick as it will take too long to dry or bake.
Materials and preparation:
The following recipe will make one batch of dough which is ample for 6-8 students.
4 cups flour
1 cup salt
1 ½ cups water
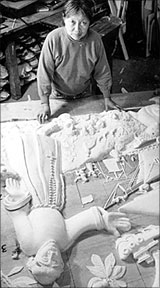
Photo by Allen Nomura
Mix the flour and salt. Add water. Knead the dough until smooth. It might take up to 5 minutes of kneading to get the flour, salt and water properly mixed. This dough is not elastic, like bread dough. It should be soft, but still firm, and be able to hold the shape of a good mound. It doesn’t like to be kneaded too much. Generally, it’s hard to make the dough softer if you have mixed it with too little water. You can, however, make the dough stiffer by adding flour and salt in the same proportions.
When you attach two pieces of the dough together (such as adding arms to a body or eyes), you should use very little water (lick it with your tongue, or dip your finger in water and paint on water) before joining the dough together. Then give it a firm press. This will make a better bond when baking. If you intend to hang your figures once they are baked, insert a looped wire or a paper clip in at the top and back of your figure so that when figure bakes, the hanger is locked in place.
After shaping your figures, bake on a tray or cookie sheet in a slow over (250 – 325 degrees) until hard. The length of time depends on the thickness of your objects. Once baked hard (they should not show the mark of your fingernail or give way when you press on them). Once cooled, you can paint details with watercolor or acrylic. Don’t use too much water in your paint or it will soften the outer surface.
Tools that are useful when making figures: a garlic press makes excellent hair, chopsticks and other circular ends for depressing circles; beans and macaroni just for fun (these have to be moistened before being affixed as well); fork tines, knives to cut out shapes, rolling pins to roll out sheets of dough that you can drape like fabric on your figures, and anything that you think will make a pattern when pressed into the dough.
If making objects that are on a board, dilute white glue (such as Elmer’s) with water (ratio ½ and ½) and brush the back of the dough object before affixing to the board. If you are working on large board panels, they will need to air dry.
Sealing the dough to protect it from moisture:
Asawa has traditionally used an oil-based plastic sealant called Varathane, but now they have water-based plastic sealants that might work just as well and are non-toxic. The plastic coating is very important if you want your figures or baker’s clay panels to last for many years. Experiment with a water based sealant before assuming it will be as durable as an oil-based sealant.